Mark Robinson's amazing raised vegetable beds & pond


Just thought I would share with you my raised bed project.
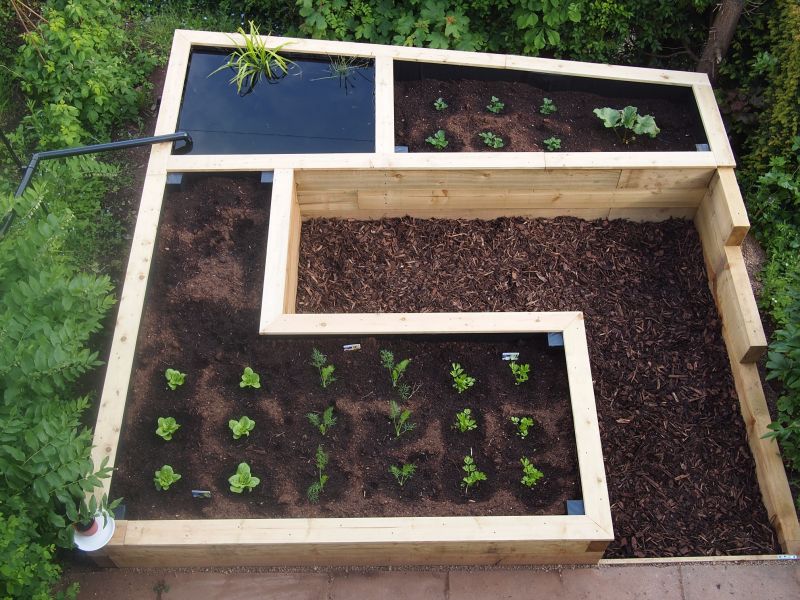
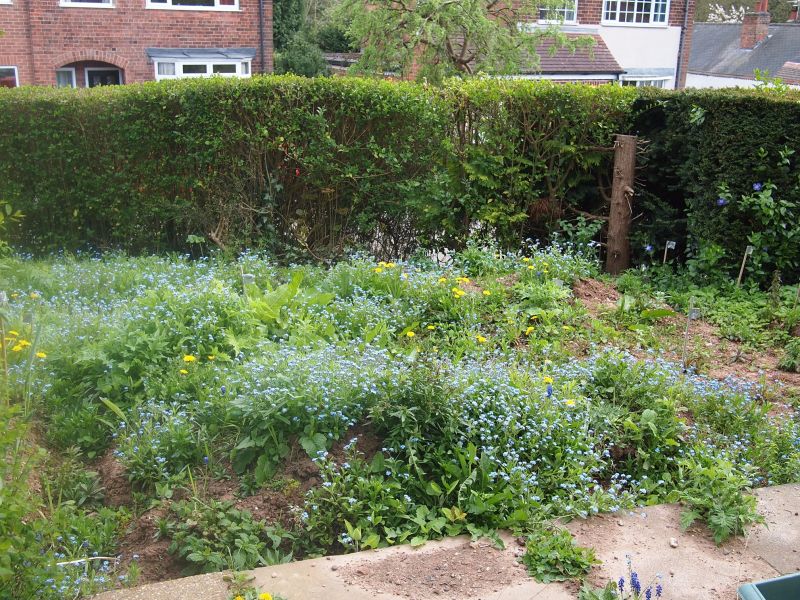
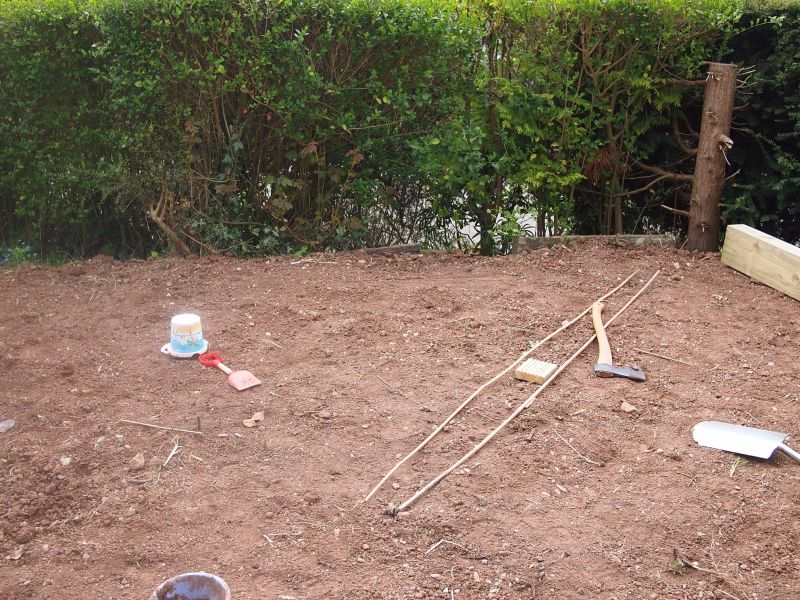
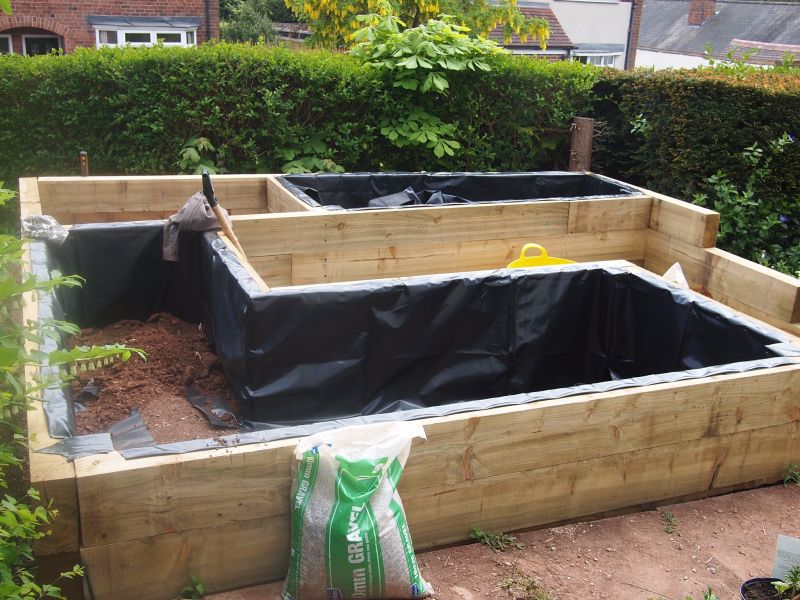
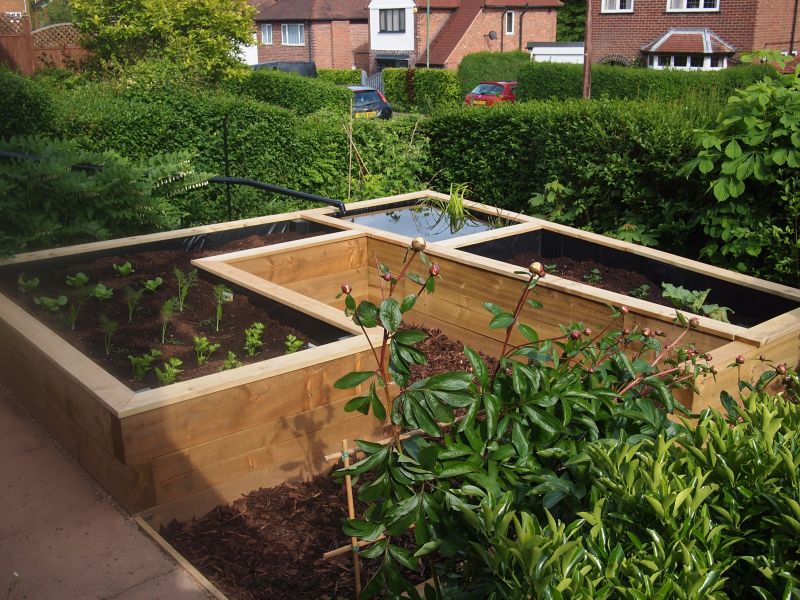
I started off with a front garden that was unkempt and full of weeds. I wanted to tidy up the area and grow some vegetables in raised beds. The garden was on a slope so I started off by clearing the weeds and levelling the ground. I designed the layout to maximise the area of raised beds while trying to keep them easily accessible. I took on board the advice from your website and kept the beds to about 120cm wide and only 70cm wide if I could only access them from one side. I ended up with a 'J' shaped layout. However, there was still one corner that would not have been very accessible for growing plants so I decided to be a bit more ambitious and use the corner for a pond.
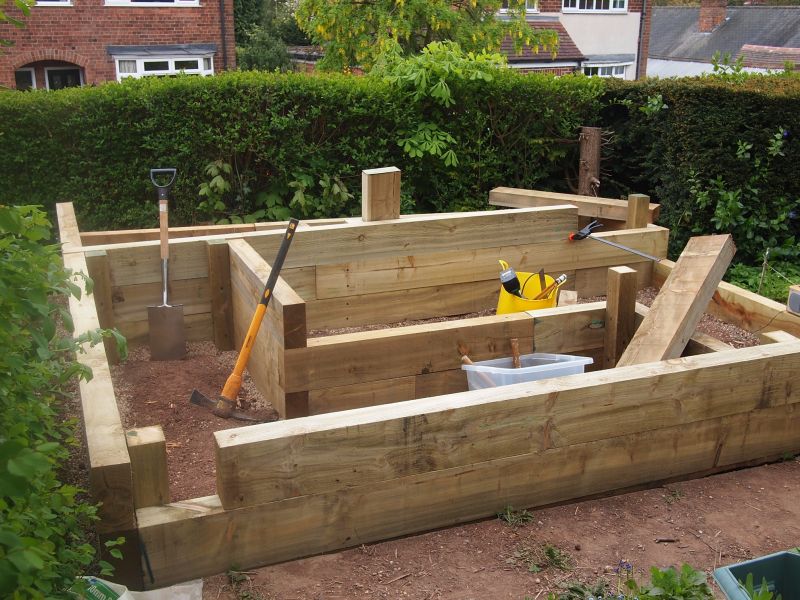
A dug shallow trenches for the sleepers and lined with pea gravel, hoping this will aid drainage and extent the life of the wood. As I built up the railway sleeper layers I secured with timberlock screws and 100x100mm posts in the corners. The entire structure is freestanding but solid as a rock.
Once the railway sleeper beds were built I lined them with damp proof membrane (once again to keep the wet soil away from the wood and hopefully extend its lifespan).
For the pond I dug down a bit so it is about 1 meter deep. I lined it with DPM, a protective liner and finally a pond liner but only secured all this once the pond was full of water.
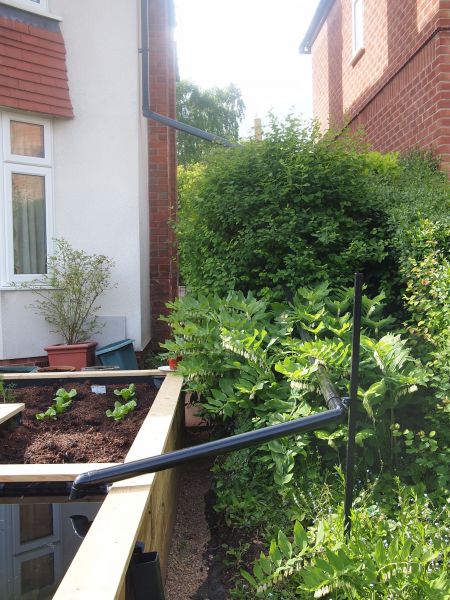
Finally I topped off the railway sleeper beds with deck boards, lined the ground with weed membrane and covered with bark chips. I also redirected one of my drainpipes away from the house, through a bush and into the pond. Now, when it rains the pond fills and I use the pond to water the plants.
I have attached some photos.
Thank you for a great website. I am no DIY expert so all the advice and ideas on the site were invaluable.
Kind regards,
Mark Robinson.
RAILWAY SLEEPERS USED
New pine railway sleepers
RailwaySleepers.com Says..
Congratulations Mark. What a fantastic project that has been designed and built with skill and precision that would put to shame many professional landscapers. A big thank you for all your photos and description of your handywork. A wonderful project.