Building walls, raised beds & ponds with Railway Sleepers
How do you build a RETAINING WALL with railway sleepers? See below!
How do you build a RAISED BED with railway sleepers? See below!
How do you build a RAISED POND with railway sleepers? See below!
How to build a RETAINING WALL with railway sleepers?
 There are hundreds of different RETAINING WALL PROJECTS, on our railway sleepers projects page. Take a look! It is a fantastic resource that will fill your head with wonderful dreams and inspiring ideas about using railway sleepers to build walls! If you can't find what you are looking for, or need advice, then give us a ring.
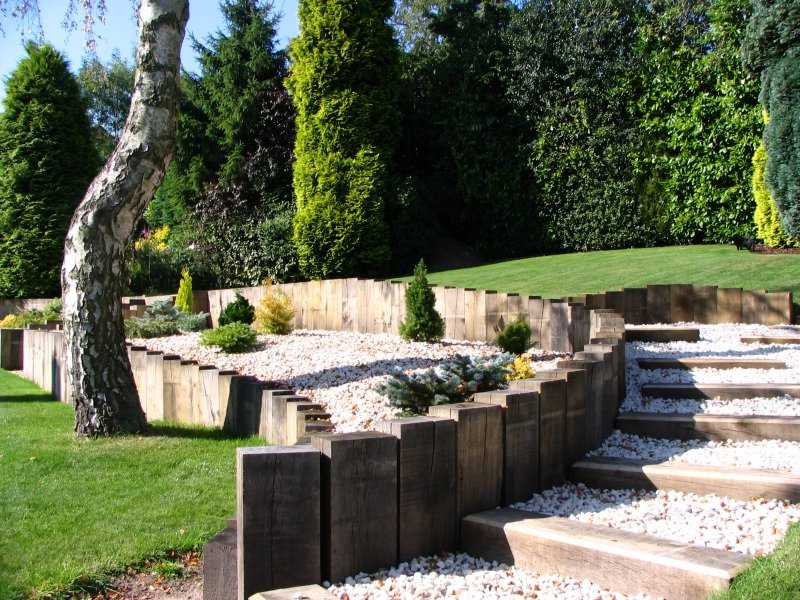
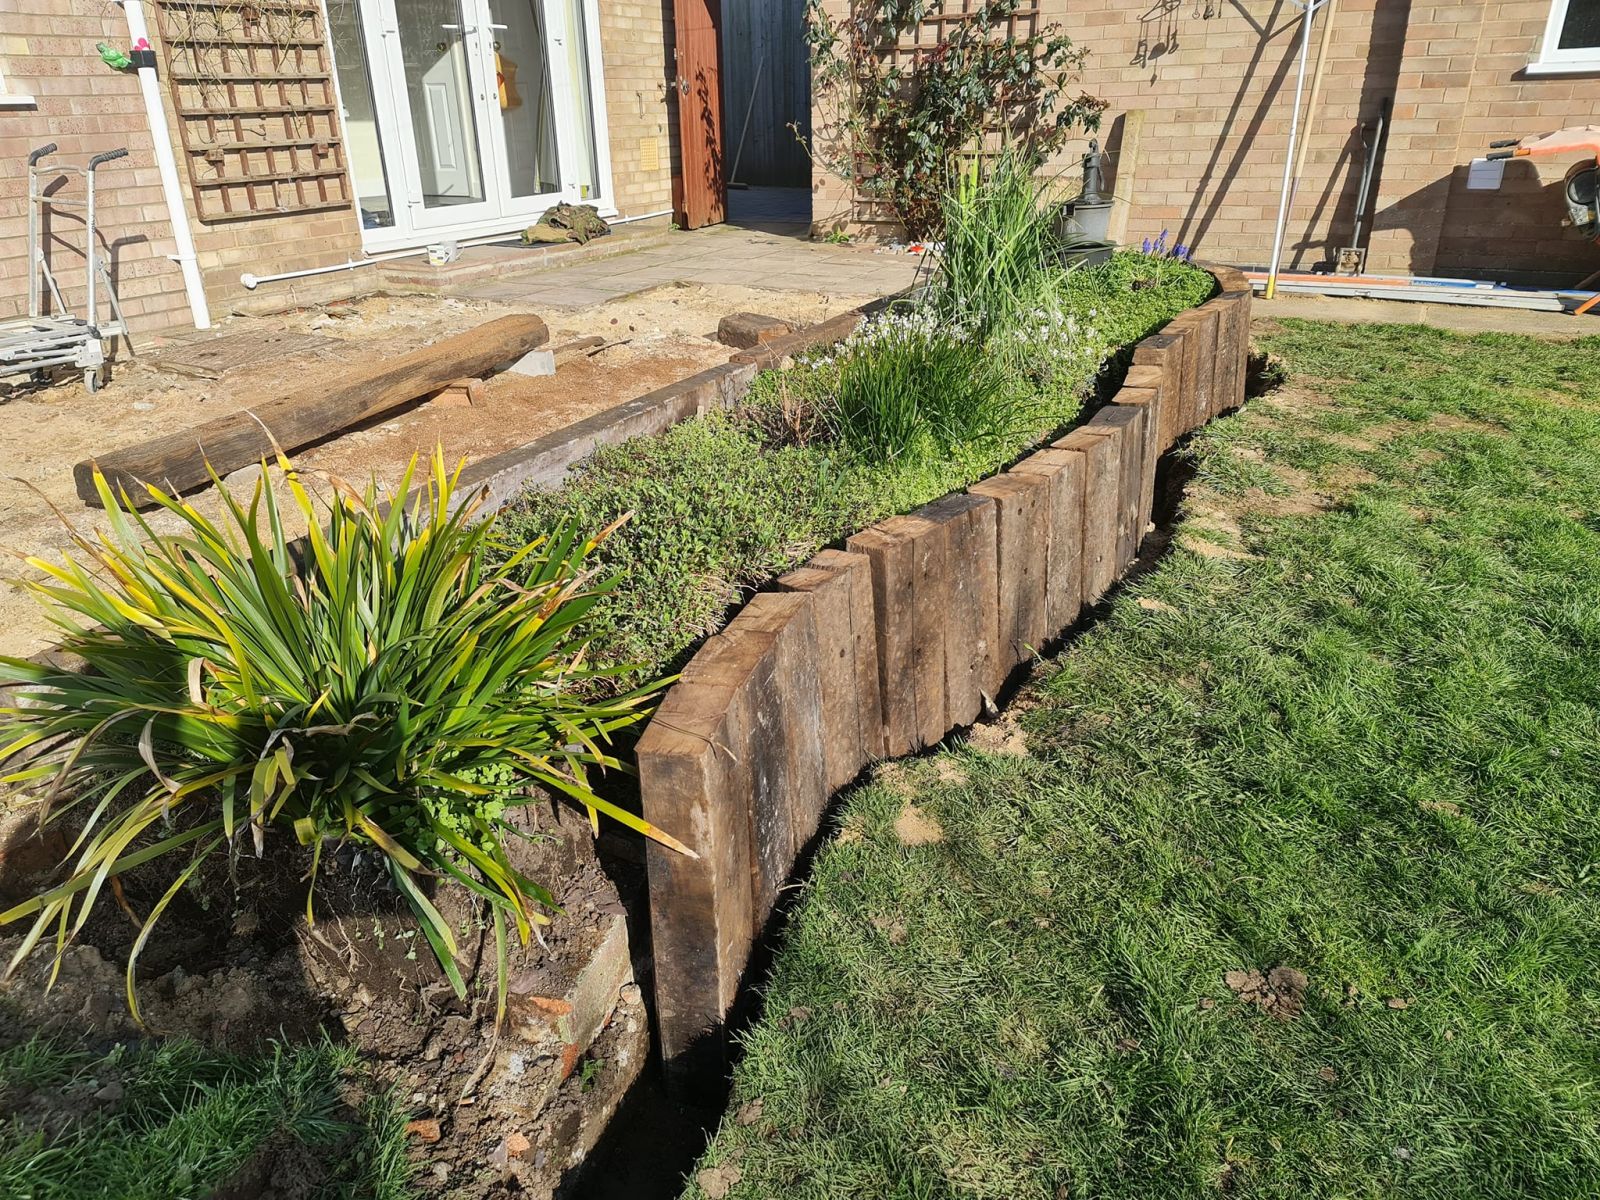
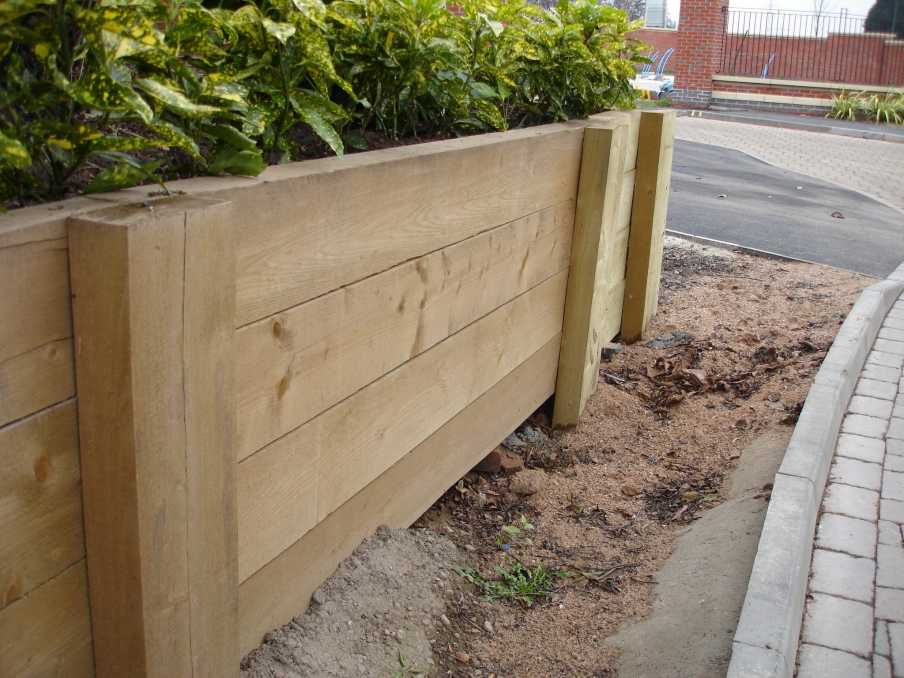
How to build a retaining wall from UPRIGHT or VERTICALLY placed railway sleepers.
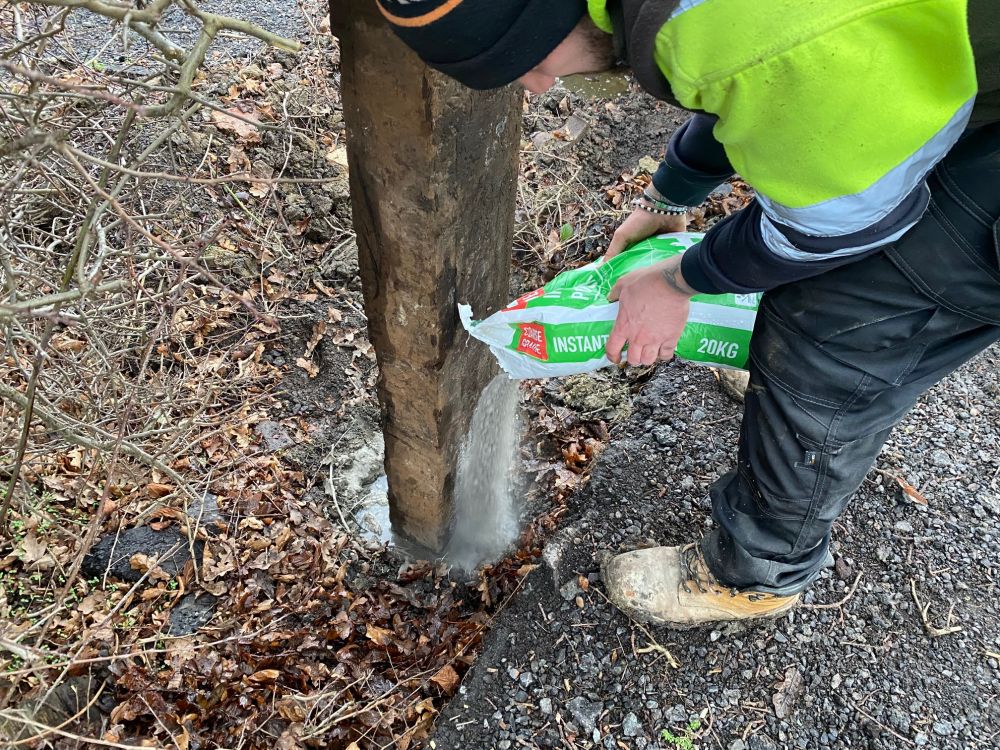
The advantage of using vertically placed railway sleepers is that you can vary the height of the wall in different places, and you can create a curved wall, rather than straight. Constructing a retaining wall out of upright railway sleepers is pretty straightforward. Simply dig a trench, lower the railway sleepers in vertically side by side, and then backfill with a dry concrete mix, that you can ram down around the railway sleepers until the wall is rigid. The advantage of a dry cement mix is that whilst constructing the wall, you can take out and re-position the railway sleepers without getting wet concrete everywhere. If the ground is damp, the concrete will set without having to add water. If not, simply use a watering can or hose.
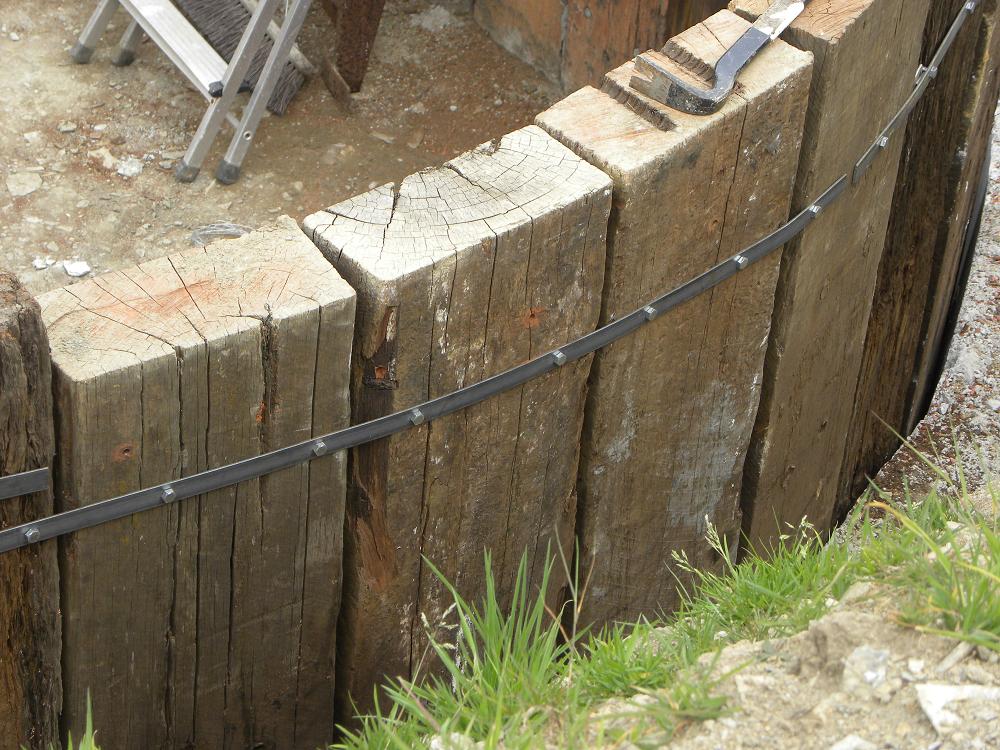
 Having fixed the railway sleepers in place and set the concrete, you can also connect the backs of the railway sleepers together, with lengths of wood, metal strips or wire. That will help to strengthen the retaining railway sleeper wall, if there is any pressure at any one point by soil pushing the railway sleepers forward. This system should equally work in a curved wall situation.
The depth of the trench depends on the height of the wall, and the pressure of the earth or material you are retaining. Allow for when the ground is sodden, and the pressure increases. Some landscapers go with the saying: 'one third in the ground, and two thirds out'. So, you'd probably need to be thinking of putting the railway sleepers in about 0.5m in the ground if the railway sleeper wall is 1m high.
Thinking about drainage. Do you need to protect the railway sleeper wall from wet soil?
If there's going to be water building up behind the wall, where will it go? Some people place a layer of pea gravel, or drainage pipe at the base of the railway sleeper wall, before backfilling with soil, so that the water can be channelled out. Some landscapers also choose to fix a plastic sheet or damp proof membrane (DPM) on the inside of the retaining wall, to create a barrier between the wet soil and the railway sleeper. At the same time there are landscapers who don’t do this as they fear trapping moisture between the plastic and the timber, and exacerbating the situation. Unfortunately the jury seems to be out on this, so you'll have to make your own mind up! There are also landscapers who paint the surface of the railway sleeper that is in contact with the soil with some kind of bitumen barrier paint or damp proof product that you would brush onto walls if you had a damp problem. Likewise there are landscapers who apply fence or shed treatment every couple of years or so to the surface of the railway sleepers to help longevity and freshen them up. Decisions..decisions!
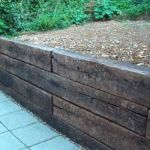
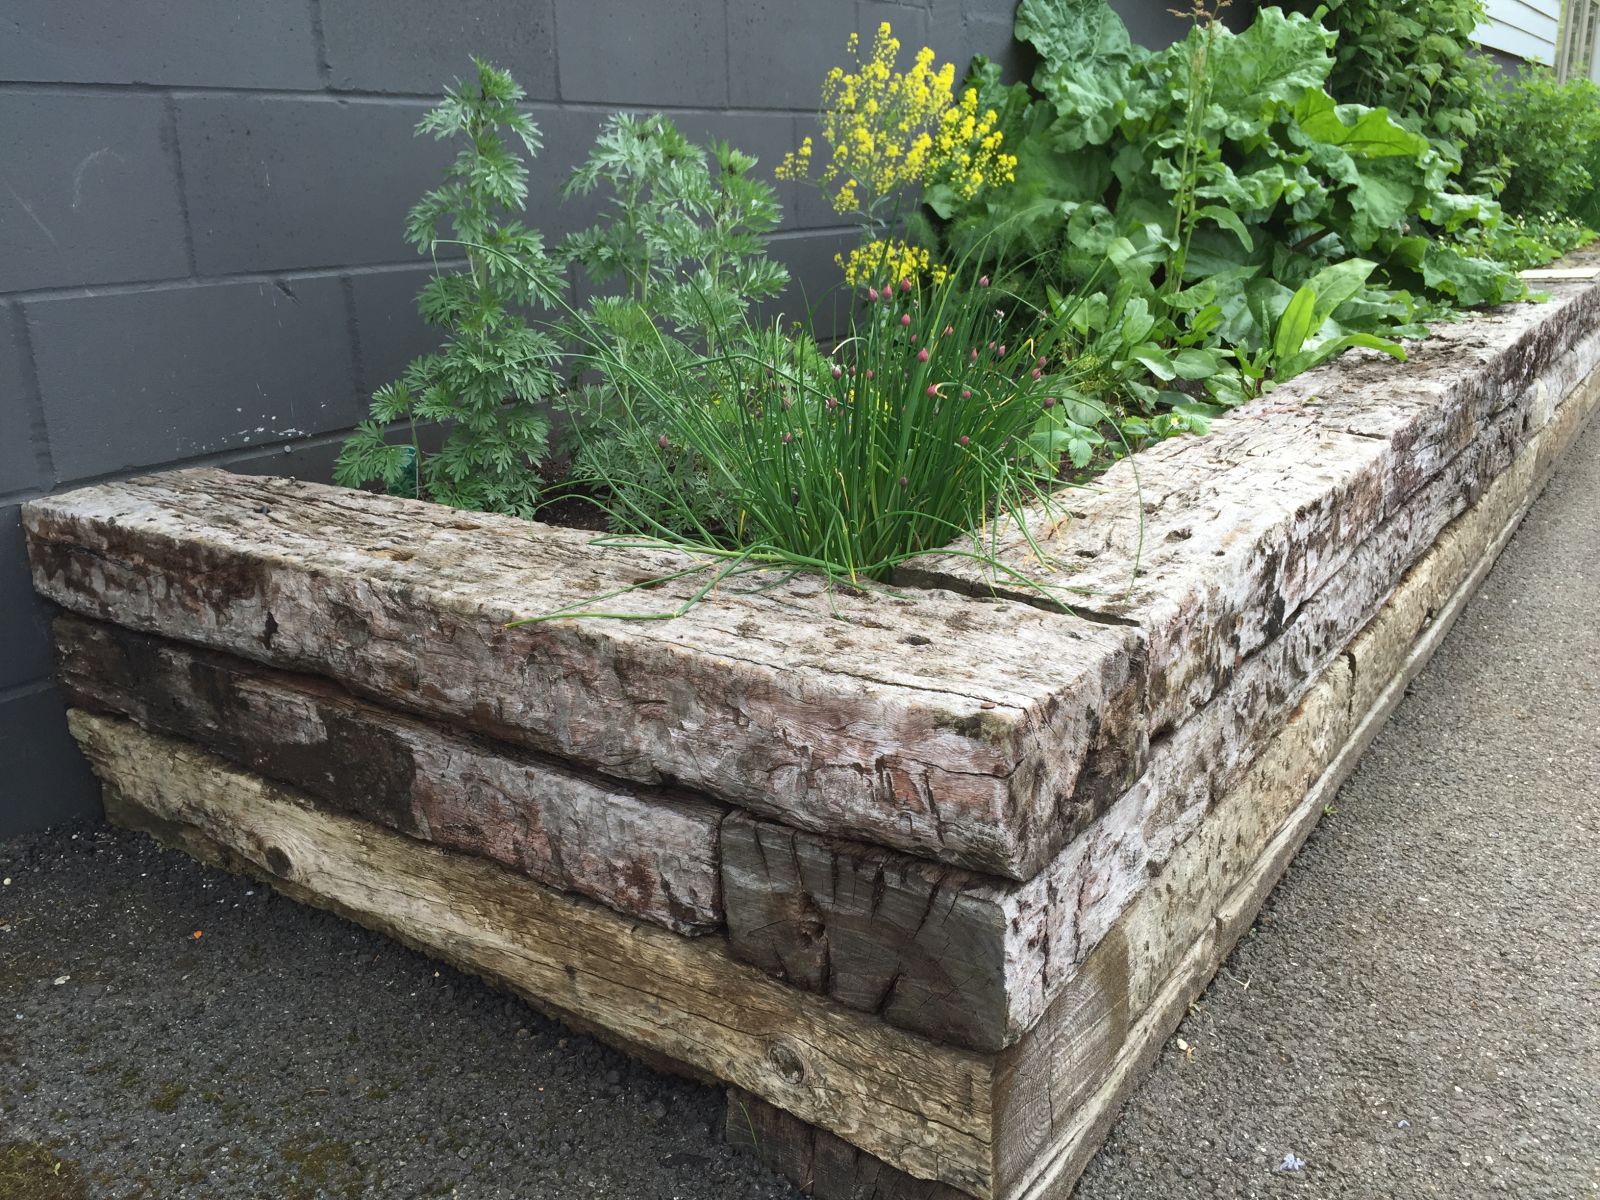
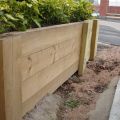
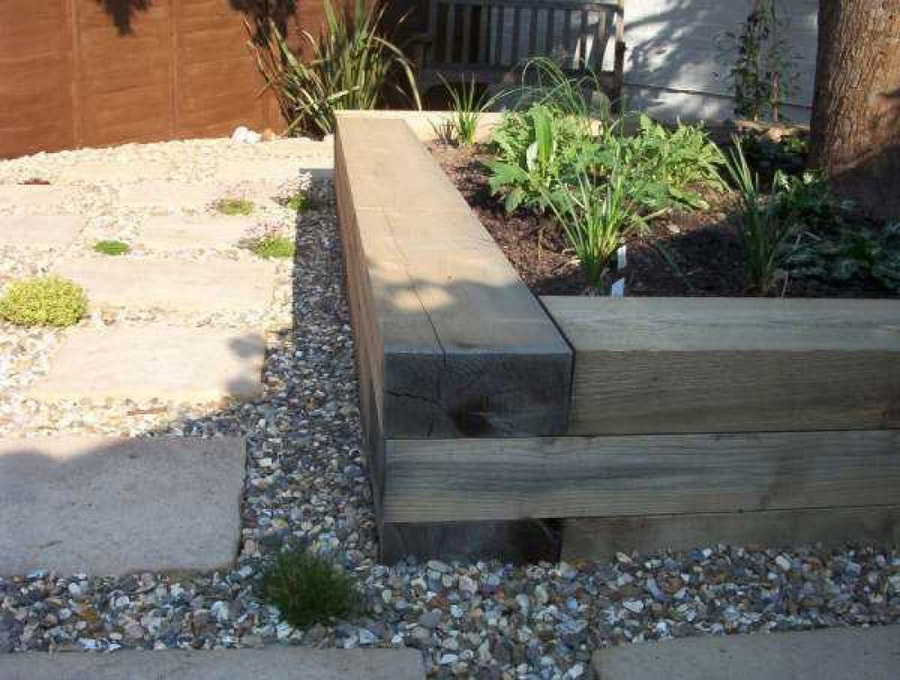
 How to build a retaining wall or raised bed using railway sleepers stacked horizontally.
The most important thing is that the railway sleepers are laid on a surface that is level and firm. Perfectionists and Engineers will do this on a foundation of concrete, but more mortal people will often simply use gravel or hardcore or sand or even the soil itself if it is solid. There are advantages of using something that will enable drainage of the raised bed or retaining wall, otherwise you are constructing a raised pond !
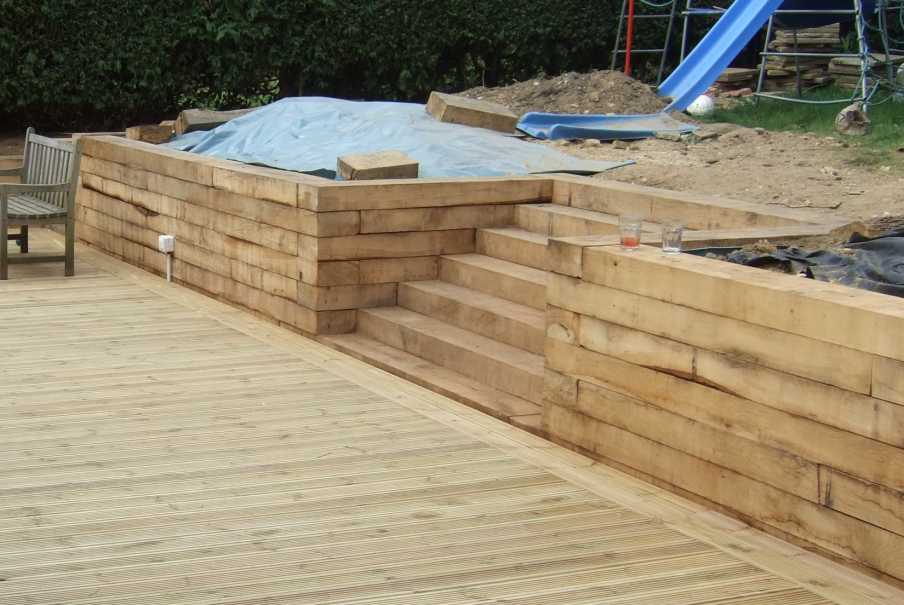
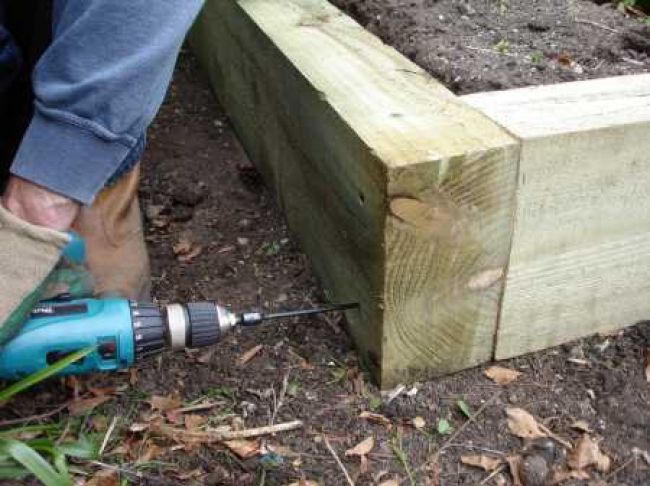
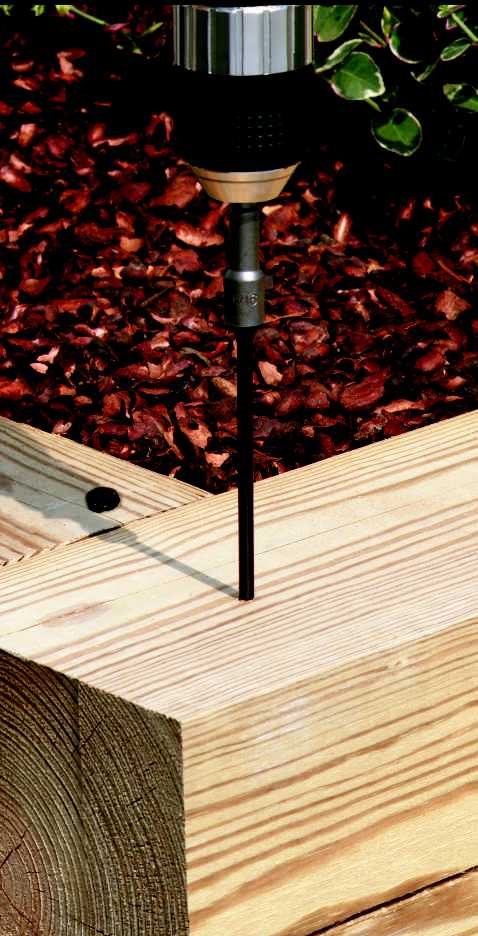 If you are stacking the railway sleepers horizontally on their broadest side, e.g. on the 250mm width of a 250mm x 125mm sleeper, then all you need to do is to overlap the joints of the railway sleepers, from layer to layer, like building a brick wall, and fasten each layer to the layer below with timberlok screws or similar. You have now created a structure that is interlocked, and could be picked up in one piece by a crane ! (If you had the inclination!) An exception to this, is if you build a long straight wall that is more than several railway sleepers high. In this case, you may need vertical retaining posts (or even railway sleepers), along the length of the wall, to support the wall from leaning forward. In this case, simply concrete the vertical posts into the ground, and fasten the stacked railway sleepers to the posts with Timberlok sleeper screws. (see website page for sizes and details).
If you are stacking the railway sleepers horizontally on their narrowest side, e.g. on the 125mm width (on a 250mm x 125mm sleeper), and two or more railway sleepers high, then you will need to support the railway sleeper with vertical posts, to stop them being toppled over by the weight of the soil or whatever.. Simply dig a hole and fix the vertical retaining posts (or railway sleepers) in with dry mix concrete. When you've done that, you can simply stack the railway sleepers against the post, and fasten them together with Timberlok sleeper screws (See website page for sizes and details)
Which type of railway sleeper should I use?
There is a wide choice of railway sleepers, so sometimes it's hard to choose which one to use for a retaining wall. Have a look at 'WHICH RAILWAY SLEEPERS ARE BEST?' Whether you want a new crisp lined retaining wall, or an old more weathered look, there are railway sleepers for everyone!
VOTE OF CONFIDENCE!
Please help us spread the word! If you've found our website helpful or inspiring please leave feedback or 'Like us' on Facebook, Instagram or Twitter. A simple way of letting people know "This is a really useful website!" Thanks


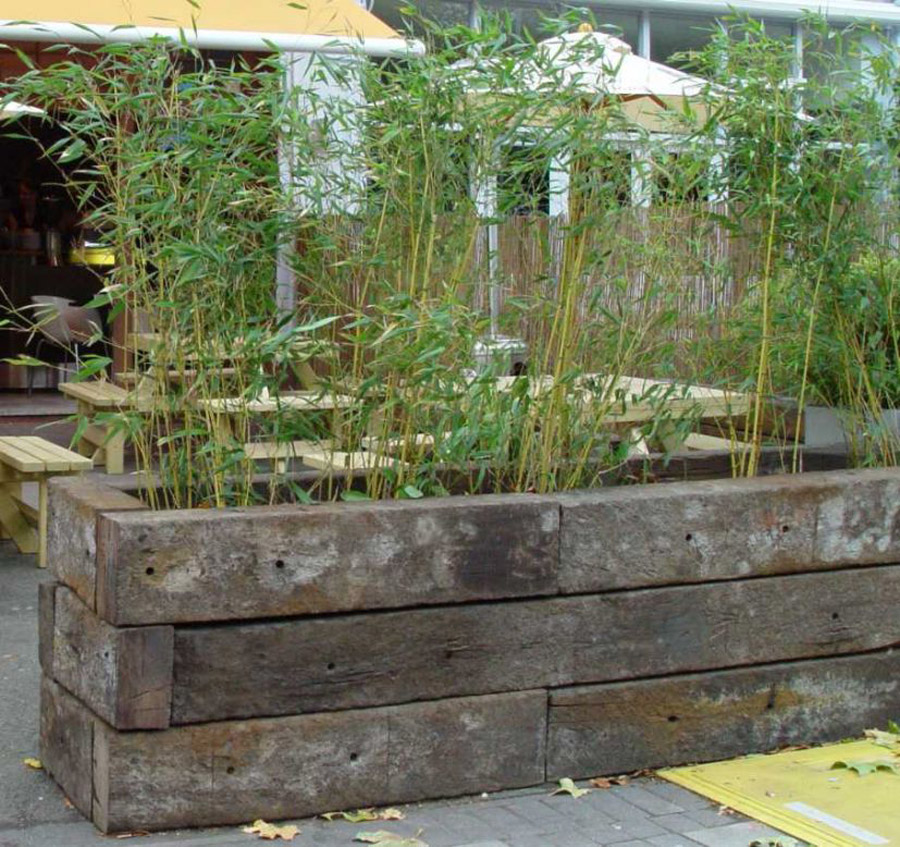
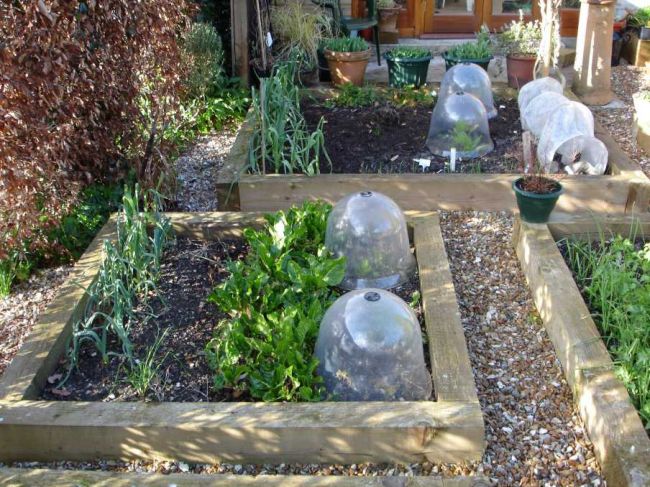
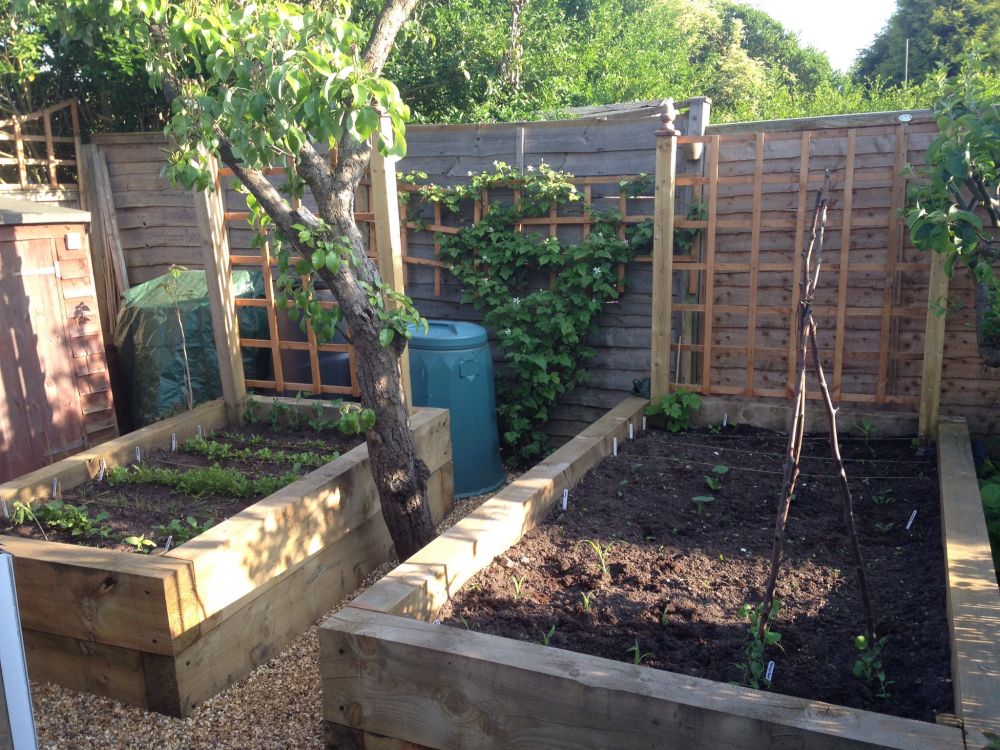
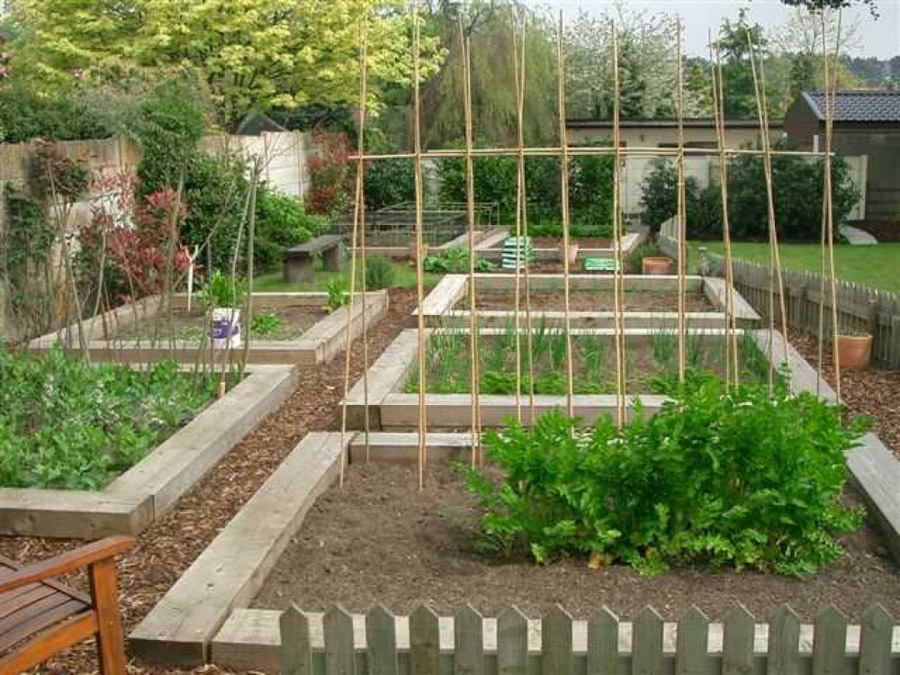
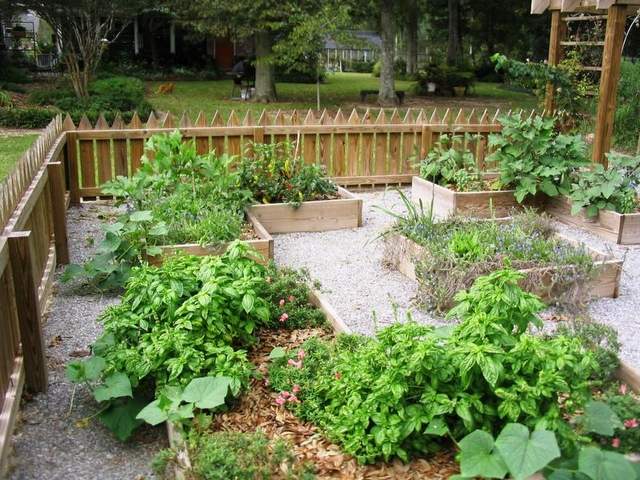
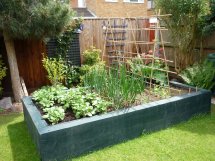
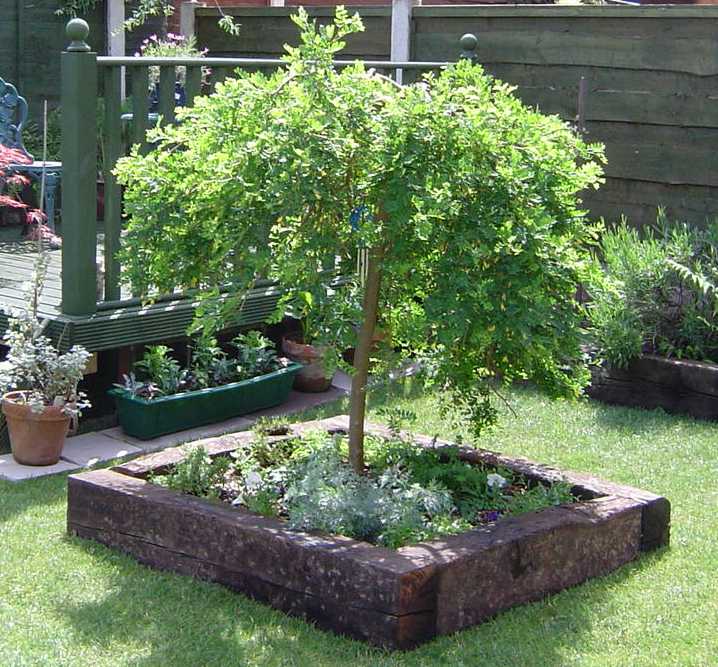
How to build a raised bed with railway sleepers
There are 100's of different RAISED BED PROJECT IDEAS, on our railway sleepers projects page. Take a look! It is a fantastic resource that will fill your head with wonderful dreams and ideas about making raised beds out of railway sleepers! If you can't find what you are looking for, or need advice, then give us a ring.
How to build a raised bed with railway sleepers
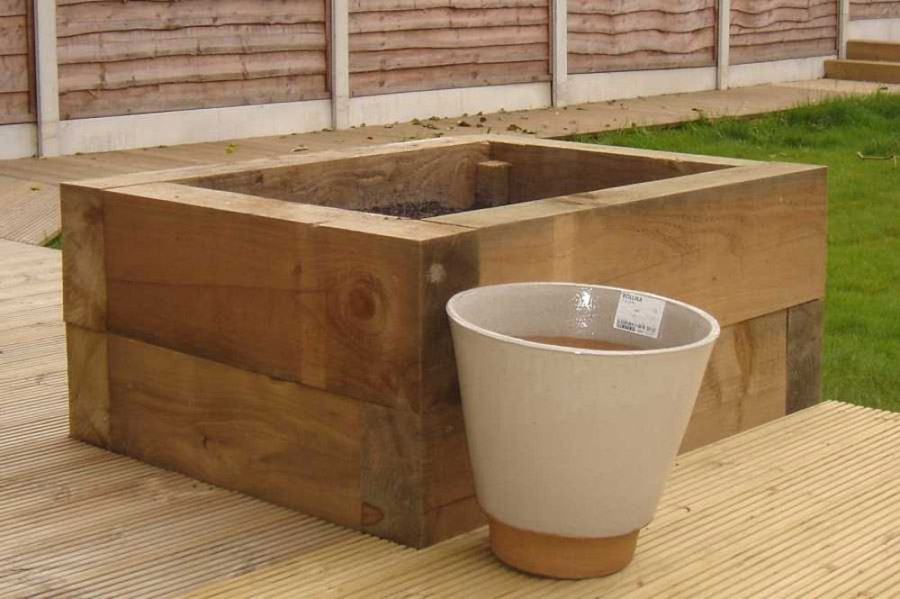
Constructing a raised bed out of railway sleepers is amazingly straightforward. Think lego or wooden building blocks. Very quick & simple, with very little tools needed.
1) Choose where you want to put the raised bed
Consider where the raised bed will be positioned and whether you can stand or sit next to one side of the raised bed, or whether both sides are accessible.
2) Lay the railway sleepers on the ground.
Place the railway sleepers on the ground in a square or rectangular shape, with the railway sleepers touching at the 90 degree corners. (Like creating a big picture frame). The railway sleepers should ideally be laid on a surface that is level and firm. Many people simply lay them down directly on the earth, grass, deck or concrete. Perfectionists and Engineers will probably consider a foundation of concrete or hardcore, but more mortal people will often go for the simpler, quicker option. There are advantages of using something that will enable drainage of the raised bed, otherwise you are unintentionally constructing a raised pond!
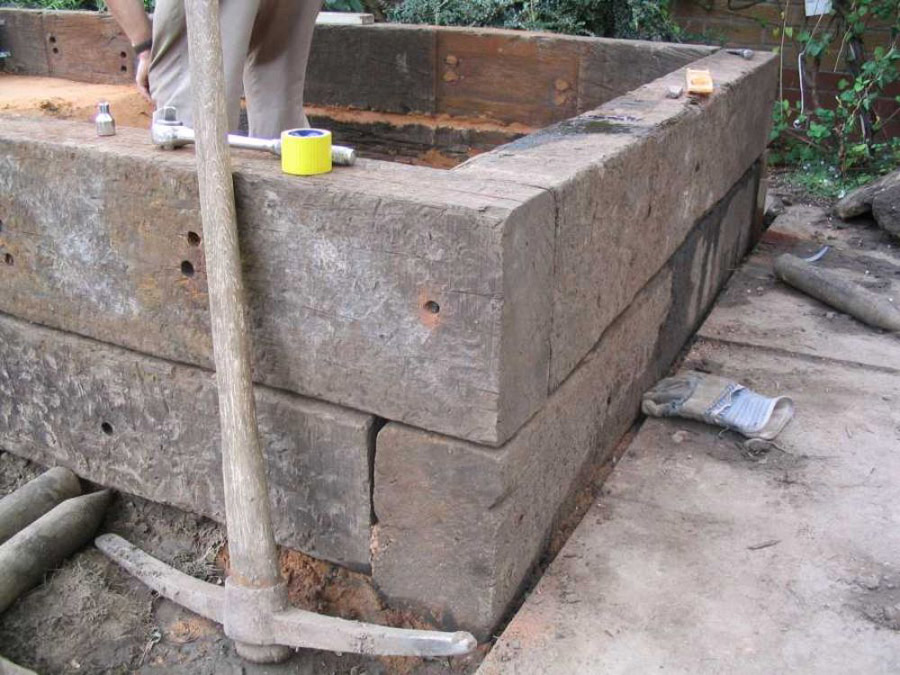
3) Fasten them together
Fasten the railway sleepers together with Timberlok sleeper screws (See website page for sizes and details) If you have placed the railway sleepers on the ground on their narrow edge, as in the photo opposite, then simply screw them together at the 90 degree corners, allowing at least 50mm (or 2") of the screw to go into the adjoining sleeper. Two screws per corner is a good solid formula.You can also use Steel Angle Brackets or Flat Connector Plates.
 If you have placed the railway sleepers on the ground on their wider edge, then again simply screw them together at the 90 degree corners, allowing at least 50mm (or 2") of the screw to go into the adjoining sleeper. You will obviously need to screw through more of the railway sleeper than on the narrow edge option. The one exception is if you are intending to have a second layer. In this case, you don't have to attach the first layer to itself. Simply place the second layer on top of the first (remembering to overlap the joints) and simply screw through the second layer into the first layer below) Repeat if you want a third layer. Again, at least two screws per sleeper end is a good solid formula. You have now created a structure that is interlocked, and could be picked up in one piece by a crane! (If you had the inclination !)
4) Stack and fix a second layer (if you want the raised bed to be higher)
If you are stacking the sleepers horizontally on their broadest side, e.g. on the 250mm width of a 250mm x 125mm sleeper, then all you need to do is to overlap the joints of the sleepers, from layer to layer, like building a brick wall, and fasten each layer to the layer below with timberlok screws or similar. You have now created a structure that is interlocked, and could be picked up in one piece by a crane, if you had the inclination! You can also use Steel Angle Brackets or Flat Connector Plates.
5) Thinking about drainage. Do you need to protect the railway sleepers from wet soil?
If there's going to be water building up behind the wall, where will it go? Some people place a layer of pea gravel, or drainage pipe at the base of the railway sleeper raised bed, before backfilling with soil, so that the water can be channelled out. Some landscapers also choose to fix a plastic sheet or damp proof membrane (DPM) on the inside of the raised bed, to create a barrier between the wet soil and the railway sleeper. At the same time there are landscapers who don’t do this as they fear trapping moisture between the plastic and the timber, and exacerbating the situation. Unfortunately the jury seems to be out on this, so you'll have to make your own mind up! There are also landscapers who paint the surface of the railway sleeper that is in contact with the soil with some kind of bitumen barrier paint or damp proof product that you would brush onto walls if you had a damp problem. Likewise there are landscapers who apply fence or shed treatment every couple of years or so to the surface of the railway sleepers to help longevity and freshen them up. Decisions..decisions!
6) Fill with soil
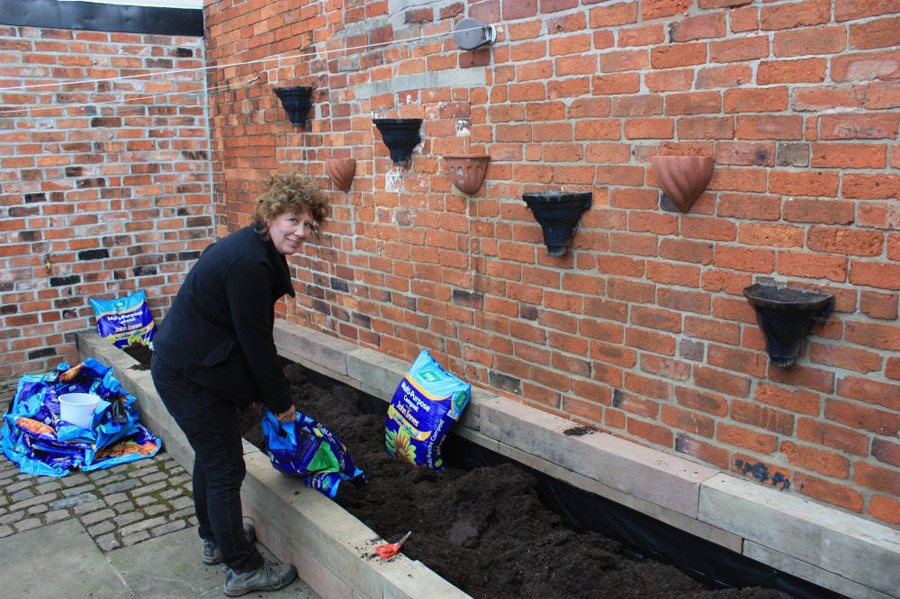 Before you fill with bags of compost, top soil or manure, it might be worth considering putting stone / bricks / hardcore etc.. on the bottom to encourage drainage. (FACT: Do you know that many people construct raised beds as a useful way of getting rid of or hiding unwanted bits of rubble, excavated soil etc.. Cheaper than filling lots of skips!) The great thing about using raised beds is that you can fill them with whatever type of soil that best fits your planting. e.g. lime hating rhododendrons, camellias, azaleas and heathers require a more acidic soil. Raised beds are more likely to lose soil nutrients sooner than ordinary beds, so ideally, a mix of 50 per cent mix of garden soil and 50 per cent peat or substitute compost with extra fertilizer should give you good results for your raised railway sleeper beds. You may need to top up your railway sleeper raised bed with soil or compost again in 12 months. To improve keeping moisture in the bed, you can apply a top surface of your choice such as wood chip, bark or pebbles. The soil in the raised bed can take time to settle and may need topping up – this could take a few years in the highest of raised beds so some plump for just planting annuals or vegetables to start with and leave permanent plants for a later time.
7) Fill with plants!
That's the best bit!
OTHER QUESTIONS
 a) Which type of railway sleeper should I use?
There is a wide choice of railway sleepers, so sometimes it's hard to choose which one to use for a raised bed. Have a look at 'WHICH RAILWAY SLEEPERS ARE BEST?' Whether you want a new crisp-lined raised bed, or an old, weathered raised bed, it is generally advisable to avoid creosote treated railway sleepers, that can ooze sticky tar in the summer, and get on skin, clothes, children, pets etc.. So, where does that leave you? What kind of non-creosoted sleepers can you use? Ideally, a choice of:
New British Pine eco friendly railway sleepers
New Oak railway sleepers
Used Jarrah & Tropical G1-2 hardwood railway sleepers
Used Jarrah & Tropical Top grade hardwood railway sleepers
Used African Azobe grade 1 hardwood railway sleepers
Used African Azobe Top grade tropical hardwood railway sleepers
b) Height & width of a raised bed
Width: Of course you can construct a railway sleeper raised bed in any size, length or height you fancy. However if you want a raised bed which you can comfortably access from both sides without standing on the soil, you need it to be a maximum of about 1.2m wide. At this 1.2m width you should be able to easily reach all areas of the raised bed. If you can only access the raised bed from one side, the maximum width is going to be about 0.6m.
Height: The height of a railway sleeper raised bed will be determined by what’s best for you and how you want to use it. Think about whether you want to do your gardening standing up, sitting down, or kneeling, and whether you’d like to be able to sit on the edge of the raised bed. Generally speaking, an approximate height of around 900-1000mm is good for standing, 650-750mm is good for sitting, and 600-620mm is good for wheelchair use.
 C(1) Advantages of a raised bed with railway sleepers
"Raised vegetable gardens are the way to go!" Two long term New Zealand residents converted to raised garden beds about five years ago and will never go back to digging in the ground. ''It's been so successful, it's definitely the way to go. Things grow so much faster, it's quite amazing, really,'' Mrs Walshaw says. ''I was picking lettuces in winter - I couldn't believe it. No questions about it, it's far superior.''
With the soil level about half a metre off the ground, the raised beds mean gardening is also physically easier for the retired couple. Anything can be grown in raised beds, which require quality soil in only the top 40cm or so. The base can be clay or any other low nutrient dirt, Mr Walshaw says. ''You just need enough rich soil to turn over. It's not a digging garden, it's a turning garden.'' Raised beds are drier and good irrigation is essential, he says.
Mr Walshaw constructed the 3.5m by 1.5m beds himself. The change from toiling in damp, hard clay-based soil has revolutionised the Walshaw's enthusiasm for vegetable gardening. Mr and Mrs Walshaw plant early rocket potatoes in September and usually start eating them in mid-November. This year, pink fir apple is also being planted, which is like a yam or Maori potato. Cabbage, lettuce, cauliflower and broccoli are grown in the raised beds, which also accommodate little cutie pumpkins. ''They just hang over the side. They're perfect for two people, so sweet and tasty.'' Broad beans, carrots, courgettes, celery, silverbeet, parsnips, spring onions and rhubarb grow in the raised beds.
''There's nothing nicer than going out and getting fresh vegetables from your garden, which taste totally different to the ones in the supermarket.'' "Raised-bed gardening is easy and produces better crops."
C(2) More advantages of raised beds from railway sleepers:
 Landscape plants need to grow in well-drained situations. A great tool to achieve this is planting in raised beds. Whether we are planting shrubs, bedding plants, perennials, vegetables or ground covers, the beds we prepare for them should be about 6 inches to 12 inches higher than the surrounding soil.
Raised beds drain faster and dry out more quickly than ground-level beds. Some gardeners complain that during dry periods raised beds from railway sleepers may need to be watered more often – and this may be true. However, you can irrigate your raised beds and make sure plants have adequate water.
We must not forget to consider drainage when designing beds and choosing plants. Drainage issues need to be addressed during bed installation. We can’t do much to improve drainage once the planting is done. Raised beds are generally the best way to ensure good drainage. If you have a low area that tends to stay wet and you don’t want to put in a raised bed, you can certainly landscape the area with plants that enjoy wet soils. It is often better to choose plants adapted to the drainage in an area rather than to try and radically change it.
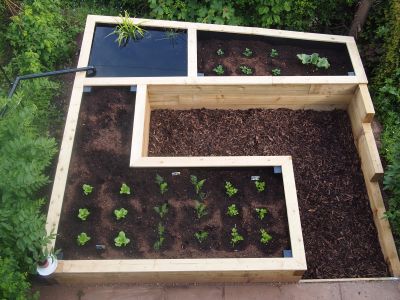
C(3) Peter's raised bed project
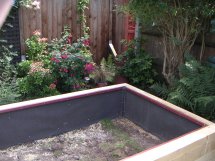
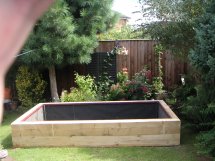
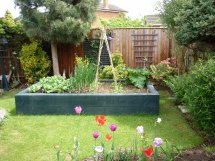
I bought 6 railway sleepers from you last August to make up a raised vegetable bed. I got two of the railway sleepers cut in half and I ended up making a rectangular box, 3 metres long x 1.5 metres wide and 0.5 metre high. The idea is to be able to work on the vegetables without having to go down on your knees and the 0.5 metre height is just right for comfortable working. The box is screwed together form the inside with large screws. The railway sleepers were made from treated pine and to make sure that the box lasts as long as possible, I lined both the inside of the box and the base of the railway sleepers touching the ground with roofing felt. I then chamfered the top edge of the box with a heavy duty sander to allow water to run off, and finally I painted the whole outside of the box green using a fence paint. It took 4 tons of top soil to fill it! The photos show the construction and as it is today with the vegetables in. I hope this may give some people an idea. It's working really well and is great to sit on to work and also have a drink on a nice evening.
Peter Nolan
RAISED BED PROJECTS SECTION!
PLEASE have a look at some of the 100's of RAISED BED projects, on our railway sleepers projects page. It is a fantastic resource that will fill your head with wonderful dreams and ideas about making raised beds out of railway sleepers! If you can't find what you are looking for, or need advice, then give us a ring.
VOTE OF CONFIDENCE!
Please help us spread the word! If you've found our website helpful or inspiring please leave feedback or 'Like us' on Facebook, Instagram or Twitter. A simple way of letting people know "This is a really useful website!" Thanks
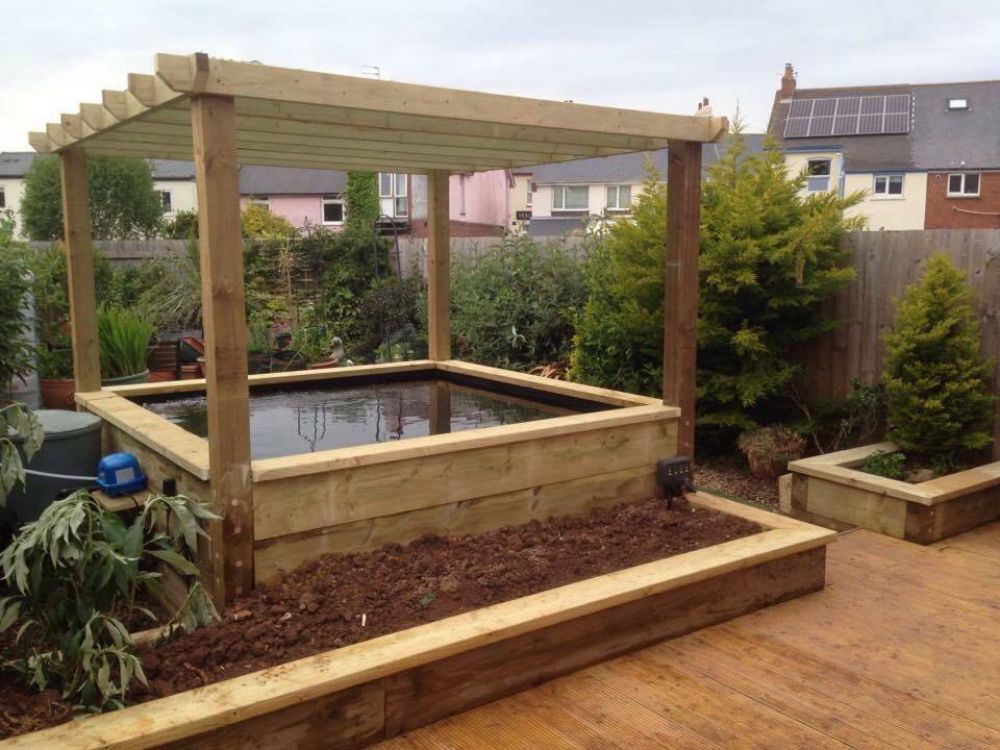
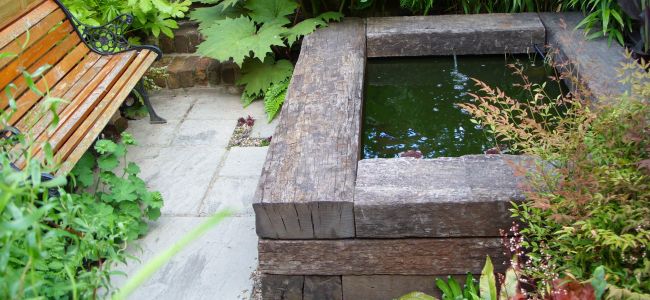
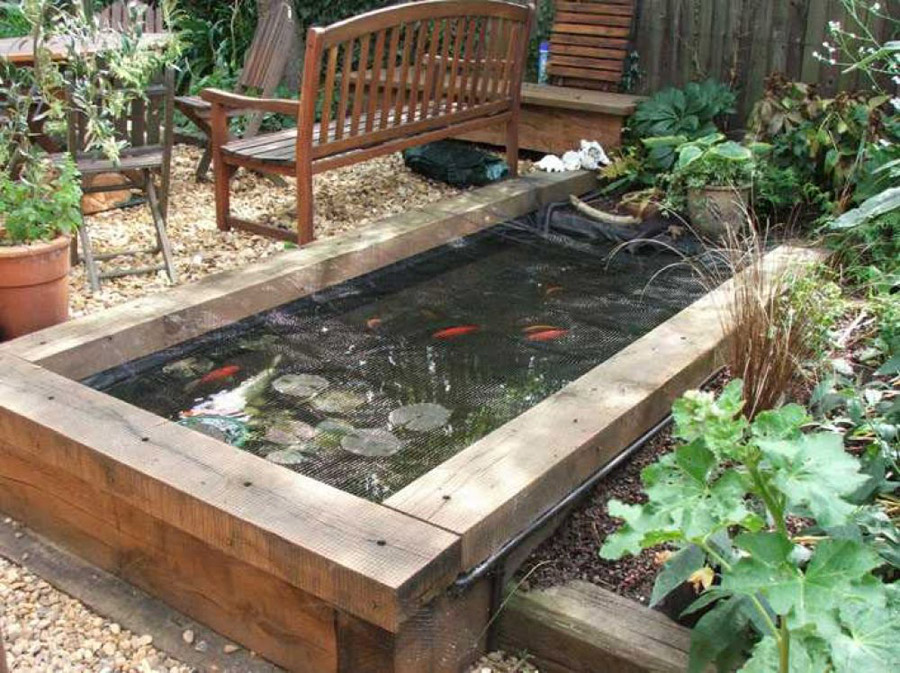
How to build a raised pond with railway sleepers
 There are 100's of RAISED POND PROJECTS on our railway sleeper projects page. Take a look! It will fill your head with inspiring ideas about creating water features with railway sleepers! If you can't find what you are looking for, or if you need advice, then give us a ring.
Constructing a raised pond out of railway sleepers is amazingly straightforward. Think of lego or of wooden building blocks. Very quick & simple to build with very little tools needed.
1) Chose where you want to put the raised pond
Consider where the raised pond will be positioned and whether you can stand or sit next to one side of the raised pond, or whether both sides are accessible.
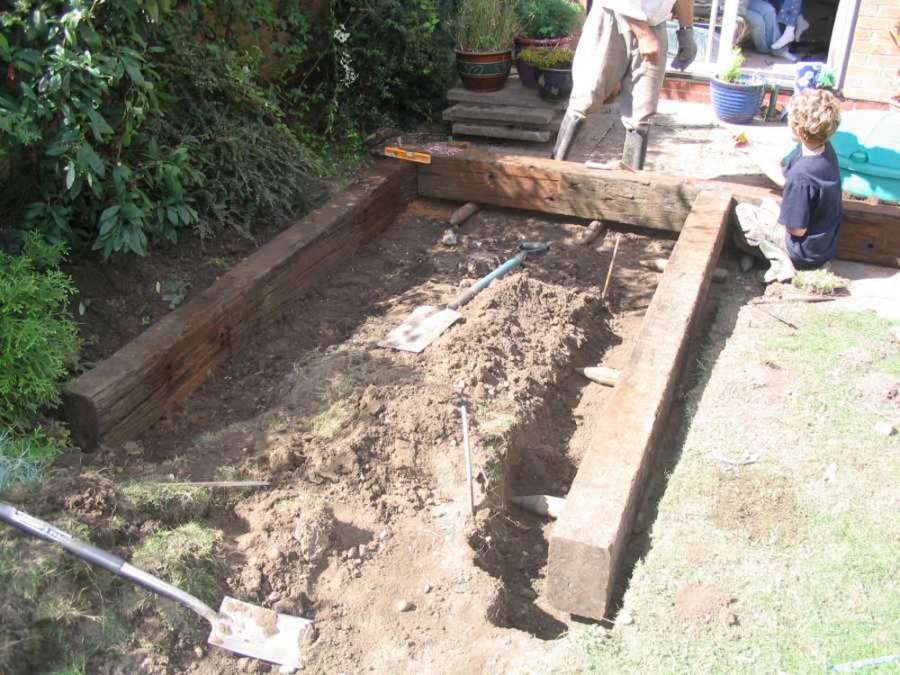
Place the railway sleepers on the ground in a square or rectangular shape, with the railway sleepers touching at the 90 degree corners.(Like creating a big picture frame). The railway sleepers should ideally be laid on a surface that is level and firm. Many people simply lay them down directly on the earth, grass, deck or concrete. Perfectionists and Engineers will probably consider a foundation of concrete or hardcore, but more mortal people will often go for the simpler, quicker option. As you are building a raised pond, you don't have to think of drainage in the same way as a raised planter or vegetable bed.
3) Fasten them together
Fasten the railway sleepers together with Timberlok sleeper screws (See website page for sizes and details) If you have placed the railway sleepers on the ground on their narrow edge, as in the photo opposite, then simply screw them together at the 90 degree corners, allowing at least 50mm (or 2") of the screw to go into the adjoining sleeper. Two screws per corner is a good solid formula.
If you have placed the railway sleepers on the ground on their wider edge, then again simply screw them together at the 90 degree corners, allowing at least 50mm (or 2") of the screw to go into the adjoining sleeper. You will obviously need to screw through more of the railway sleeper than on the narrow edge option. The one exception is if you are intending to have a second layer. In this case, you don't have to attach the first layer to itself. Simply place the second layer on top of the first (remembering to overlap the joints) and simply screw through the second layer into the first layer below) Repeat if you want a thrird layer. Again, at least two screws per sleeper end is a good solid formula.
 4) Stack and fix a second layer (if you want the raised pond to be higher)
If you want a second or a third layer, simply repeat stage 2 & 3, apart from you are placing the second or third layer of railway sleepers on to the already positioned first layer. If you have placed the railway sleepers on the ground on their narrow edge, then simply again screw the second layer together at the 90 degree corners, as above, allowing at least 50mm (or 2") of the screw to go into the adjoining sleeper. Two screws per corner is a good solid formula. Once you've done that, you will have two or more layers sitting on top of each other, but not attached TO each other. Simply now fasten the layers together with a screw that goes through the top layer to the layer below. If you don't want this to be seen, screw at 45 degrees on the inside of the raised pond, through side of the top layer into the layer below. Alternatively you can use a batten or metal strip to fasten the different layers together. The whole structure is now interlocked. If you are stacking the sleepers horizontally on their broadest side, e.g. on the 250mm width of a 250mm x 125mm sleeper, then all you need to do is to overlap the joints of the sleepers, from layer to layer, like building a brick wall, and fasten each layer to the layer below with timberlok screws or similar. You have now created a structure that is interlocked, and could be picked up in one piece by a crane, if you had the inclination! You can also use Steel Angle Brackets or Flat Connector Plates.
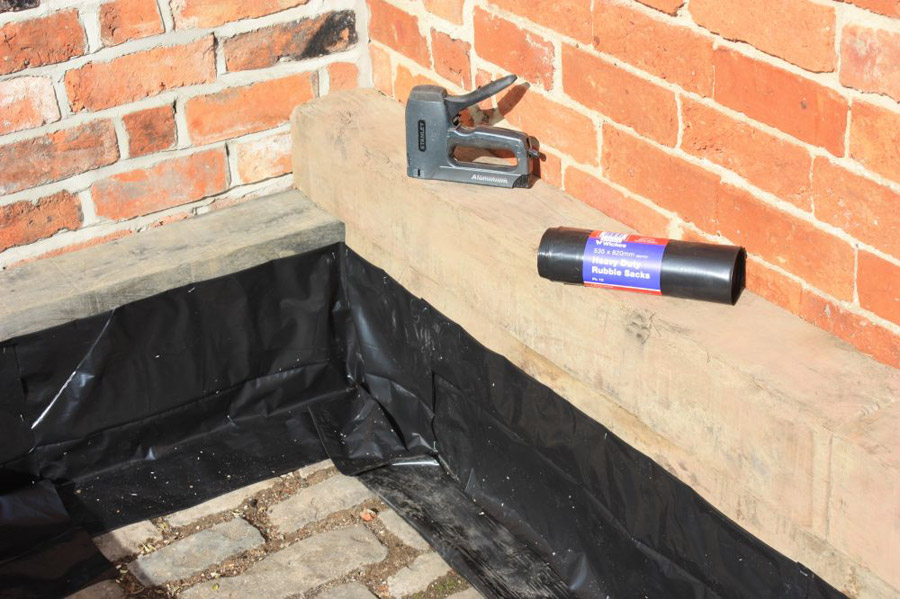
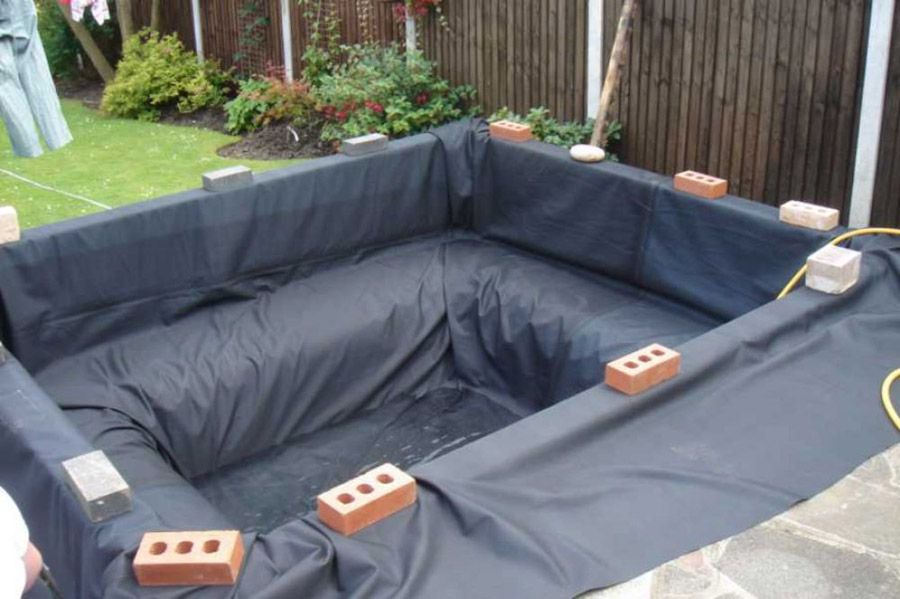 5) Pond liner.
You'll probably want to first put some carpet or material onto the floor of the pond, to cover any stones or sharp edges. Lay a pond liner that covers the inside of the railway sleeper 'container', and generously folds over the top of the railway sleepers (as in the picture). Temporarily hold it down with bricks etc.. Try and avoid trapping moisture between the pond liner and the railway sleeper, as this can encourage rot. Sometimes landscapers paint the surface of the railway sleeper that is in contact with the pond liner with some kind of bitumen barrier paint or damp proof product that you would brush onto walls if you had a damp problem.
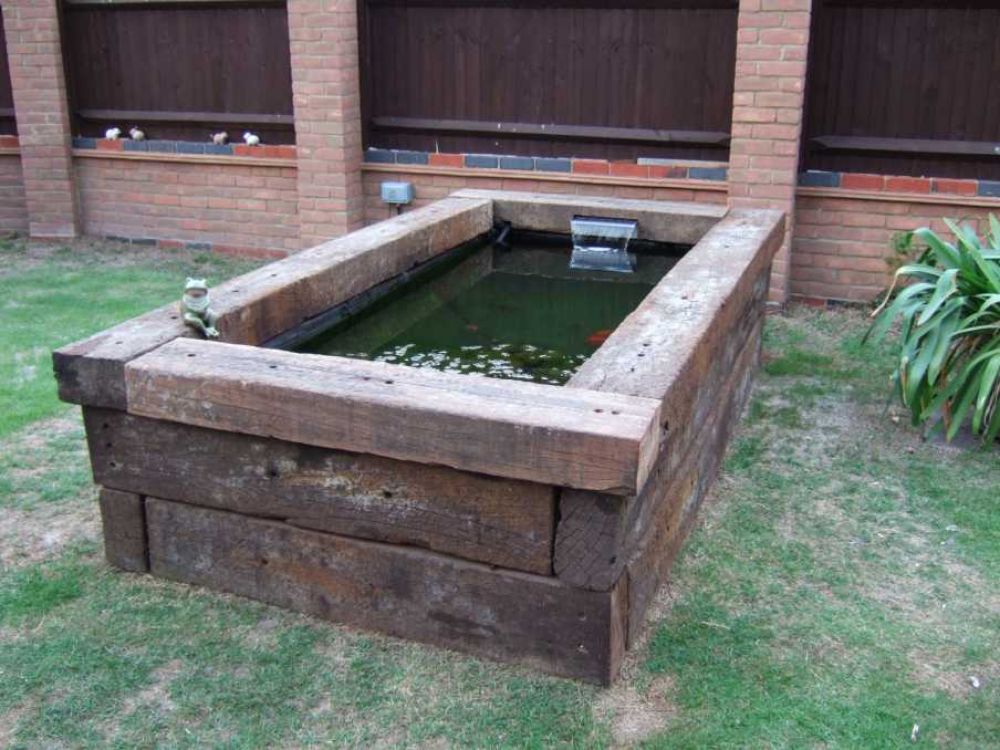
6) Fill with water.
Allow time to fill the raised pond with water, and for the liner to slowly expand into the space. When the pond is full, you will probably want to put an additional railway sleeper or timber capping on top of the liner, so as to hold it in place, and to smarten up the top finish of the pond. IMPORTANT. Don't permanently attach the liner until the pond is full, otherwise the liner may stretch and possibly tear, and THEN you've got problems!!
7) Fill with fish!
Of course you may want to add pumps & water filters, depending on the seriousness of your aquatic adventure!
OTHER QUESTIONS
a) Which type of railway sleeper should I use for a raised pond?
There is a wide choice of railway sleepers, so sometimes it's hard to choose which one to use for a raised pond. Have a look at 'WHICH RAILWAY SLEEPERS ARE BEST?' Whether you want a new crisp-lined raised pond, or an old, weathered raised pond, it is generally advisable to avoid creosote treated railway sleepers, that can ooze sticky tar in the summer, and get on skin, clothes, children, pets etc.. and also can contaminate the water for fish. So, where does that leave you? What kind of non-creosoted sleepers can you use? Ideally, a choice of:
New British Pine eco friendly railway sleepers
New Oak railway sleepers
Used Jarrah & Tropical G1-2 hardwood railway sleepers
Used Jarrah & Tropical Top grade hardwood railway sleepers
Used African Azobe grade 1 hardwood railway sleepers
Used African Azobe Top grade tropical hardwood railway sleepers
 b) Height of a raised pond
Height: Of course you can construct a railway sleeper raised pond in any size, length, height or depth you want. Sometimes, if the raised pond is placed over an excavated hole, it may be much deeper than it appears on the outside. However the ideal height of a railway sleeper raised pond will be determined by what’s best for you and how you want to use it. Think about how people will look at the pond & fish. Whether they will be standing up, sitting down and whether they'd like to be able to sit down on the edge of the raised pond. Generally speaking, an approximate height of around 900-1000mm is good for standing, 650-750mm is good for sitting, and 600-620mm is good for wheelchair access.
c) 100's of different raised pond projects
PLEASE have a look at some of the 100's of RAISED PONDS & WATER FEATURE PROJECTS, on our railway sleepers projects page. It is a fantastic resource that will fill your head with dreams and inspiring ideas about making raised ponds out of railway sleepers! If you can't find what you are looking for, or need advice, then give us a ring.
VOTE OF CONFIDENCE!
Please help us spread the word! If you've found our website helpful or inspiring please leave feedback or 'Like us' on Facebook, Instagram or Twitter. A simple way of letting people know "This is a really useful website!" Thanks
BUY ONLINE or
RING DIRECT

0115 9890445
enquiries@railwaysleepers.com
WHICH
RAILWAY SLEEPERS ARE
THE BEST?
JUST A CLICK CLICK CLICK AWAY
INSPIRATION?
NEED IDEAS?
CLICK for the WORLD'S
LARGEST COLLECTION of
RAILWAY SLEEPER PROJECTS
SHARE
your project and creation

SEND your PHOTOS to
enquiries@railwaysleepers.com
or WhatsApp 07816 959310
CONFUSED?
Need some advice?
CONTACT US & we'll help you
work out what items you need.
0115 9890445